The Max-Depth blog has been creating some great posts lately, and with this new one Timothy Hanson shows how you can make an already sculpted object in ZBrush a multi tile UV object, showing how to convert the object, and re-project the details, and use ZBrush’s Multi Map Exporter to create all the maps needed for Maya and rendering in V-ray.
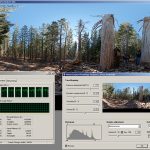
The Multi Map Exporter automates map creation for ZBrush models, allowing you to save and reload settings for maps export. This can include more than one map at a time, such as displacement, normals, ambient occlusion, and cavity maps.
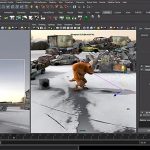
In this tutorial we will cover how to use Zbrush’s multi-map exporter to create multi-tile displacement maps, as well as how to use the “Project All” tab to make changes to our Zbrush sculpt on the flyTimothy Hanson - Max-Depth.com
Timothy sets up a possible production scenario where you have finished a sculpt in ZBrush and you need to change the UV’s of the model from a single UV tile to a multiple tile UV. Timothy shows how to re-import a new mesh into ZBrush using “append sub tool” to create a 3D Polymesh. You are then free to use the “project all” command to transfer the details of one object to the other.
There is a great overview of Multi Map Export settings before taking the files into Autodesk Maya to be rendered in V-Ray. Tim also shoes how to set V-Ray up to understand and render the displacement maps from ZBrush.
Check out Timothy’s site to read Max-Depth.com’s post on ZBrush Multi-Map Exporter: Creating multi-tile displacement maps & rendering them with Vray for Maya, and other great tutorials dealing with shading and rendering.