Maya 2016 is actually a pretty big release that has a lot of great new features. Plenty has been shown about the heavy new features, but what about the small and great little workflow and tool additions?
Here, I walk through some of the features that struck me as really great small additions in Maya 2016. I also have a quick look at some obvious ones that weren’t talked about as much.
Interface Changes.
New Interface Look And Feel.
The Maya UI is now scalable and readable on multiple displays and resolutions.
Menus And Menu Set Changes
The menus have been reorganized. Some things are moved, renamed, and streamlined. In general terms everything sits much better and seems much cleaner, although it might take a while to get used to.
As an example, the modeling menu set now includes deformers, curves, surfaces and generate – everything you would need when you are modeling. The animation menu set options have been split into two menu sets: Animation and Rigging to make them more workflow-based.
Some other menu changes include:
- Surfaces are combined with polygons
- Xgen and paint fx are under the generate menu
- NDynamics and dynamics have been unified under FX
- Bifrost is under the same FX menu
- Particles and soft/rigid bodies are gone.
- Assets are under the create and modify menus, which makes more sense.
- If you can’t find something, you can use the “FIND MENU ITEM” command and enter a search term.
Icons
All the icons in Maya 2016 have a new look. They are also iterated throughout the application. As an example, the marking menus now show the corresponding icon of the tool next to the type.
Some thought has been given to icons and their categorization. All of the icons are colored according to their group and use. This makes it is easy to see what icon is for what section. Polygons are orange, surfaces are blue, rigging icons are in purple…etc.
The shelves have also continued the streamline. There are less of them and together they all make much more sense now.
Hot Key Editor
Maya 2016 has a brand new paradigm in the hot key editor. The new Editor makes it much faster and simpler to create, edit and assign hot keys.
There is a cool visual display of exactly what keys are assigned which is really easy to read. When you press a sequence of keys, they light up on the display.
Hot key Sets and Contexts in the hot key editor will let you associate specific hotkeys with a workflow. You can now set your own runtime commands to a specific hotkey. You are even able to save and share hot key assignments with other users.
New Multiplatform Font Support
Remember when creating 3D type in Maya and choosing a font would present a minefield of typefaces that wouldn’t seem to work. Now, Maya has support for all fonts including openType, TrueType and Postscript on all operating systems. Finally.
What’s New in Modeling.
Sculpting Toolset
There are a new suite of sculpting tools in Maya 2016. You might find this familiar if you have used mud box in the past. The sculpting tools come as a assist to the blend shape workflow.
Blend shapes can now be made from sculpting sets rather than multiple changed objects. Blend shape information and data are now stored as deltas making the file size much smaller.
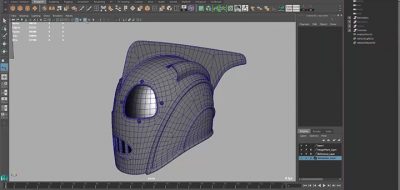
Modeling Toolkit Complete Integration
The modeling toolkit is now completely integrated in Maya 2016. This means that there are no longer two sets of transform tools. When you select extrude, bevel, or scale, it is all the same command. This also means that the transform tools now include transform constraint options such as slide edges and move along component.
There are now integrated selection constraints such as angle, border and shell. They can be accessed without activating the modeling toolkit.
The modeling toolkit integration extends to soft selection and symmetry, preferences, object and component selections, and reactivating the last tool used. The target weld tool also replaces merge edge and merge vertex, and the options for them have been added to the target weld. It is now the default method for merging components.
Move Along Normal
You can now easily move a component against its normal in Maya 2016, by holding down the control key and middle mouse click to drag. This will prove to be very useful.
New In-View Menus
New in-view menus will pop up for regular merge operations allowing you to easily set the distance threshold. This will save you quite a bit of time, not having to move back and forth between your object and the channel box or attribute editor.
Bevels
Bevel’s operation is improved and now sports a new algorithm that works to give you parallel edges for better results. You can now bevel on face selections rather than only selecting edges.
Multi-Cut Tool Is Way Better
The multi cut tool now has better drawing and snapping options. Holding shift+control while drawing will give you 90° angles. If you shift click and drag on an edge, snapping points pop up to describe the increments you can snap to.
Better Pivot Editing
Editing the pivot of an object now holds the features from the modeling toolkit, but also some new ones. Now hitting D and clicking on a component will move the pivot there. You can use modifier keys such as control, shift, and control+Shift together to adjust pivot orientation, position and alignment.
Isolate Selected
I rarely use isolate selected. It was just too cumbersome to use, always opting out for using layers instead. The new changes to isolate select may change that for me. Hitting control + 1 will enter and exit isolate select mode. Any object created in this mode auto loads by default. No more switching modes to find what you created.
New Hard Edge Display.
You can easily see the hard edges on your model by using the new hard edge display. Soft edges will still be selected, but they don’t show in this mode, only hard edges do.
Deformers To Edges And Faces
You can now add deformers to edges or face. Maya will convert the section to vertices when they are applied.
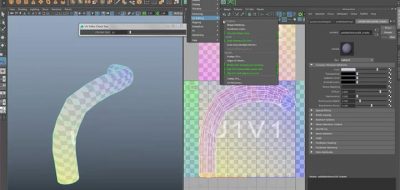
UV’s
Brush based tools seep into the UV texture editor. This makes it easy to push around UV’s in 2D space.
There is a new Contour stretch UV mapping method. This lets you project a texture onto a selection. Contour stretch mapping analyses a 4 corner selection to determine how best to stretch the polygons’ UVs. Contour stretch mapping will be great for applying textures to tracks and roads. It will work well on irregular, terrain-like objects. Also useful for fitting regular-shaped textures onto organic forms.
There is a new familiar in view editor that pops up in the UV editor when doing operations. This is similar the in-view you would get from the extrude tool. This will let you adjust attributes instead of always heading over the the channel box.
Mental Ray
Mental Ray is a separate installer form Maya 2016. This is so you can easily update MR without installing maya again.
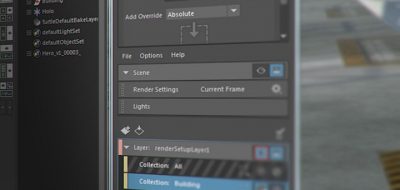
New Lights
Mental ray now has lights under the create lights menu. This includes sun and sky elements, IBL, and physical area lights. No longer will you have to create a standard Maya light and turn down the mental ray section of the attribute editor and change all the settings to make it viable in mental ray.
New Sampling Options
Mental Ray has separated some of the sampling controls for better fine tuning the sampling in a scene. The unified sampler is now renamed to “overall quality”.
New lighting quality slider affects lighting sample in the scene. There is also a environment lighting quality slider that works much the same way for image based lighting.
Deep Data EXR.
You can now output deep data EXR files. Mental ray will render out and save the image in the DeepTile of the EXR 2 file format. You can even save deep data into different frame buffers during the same render.
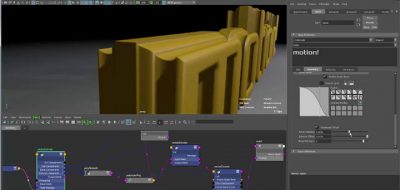
Material Definition Language (MDL).
The Material Definition Language isNVIDIA’s plan to have a standard physical material format. Pre-packaged MDL materials can be applies in mental ray for Maya 2016. MDL materials take advantage of the new rendering techniques in mental ray, as does the prior addition of the MILA materials.
did I miss anything? These are just the features that stuck out as being time savers and may prove to be invaluable in the future. Let me know if you have a favorite new thing that didn’t show up n the list.


Steve
Just worth mentioning, Mental Ray Satellite rendering is failing on the initial release citing errors of not being able to locate the shared core MDL library. Rendering without using Satellite is fine. A ticket is open with Autodesk.