Vasil Shotarov Shares Some Nice Tips That Can Boost Your Workflow When Painting Weights in Maya
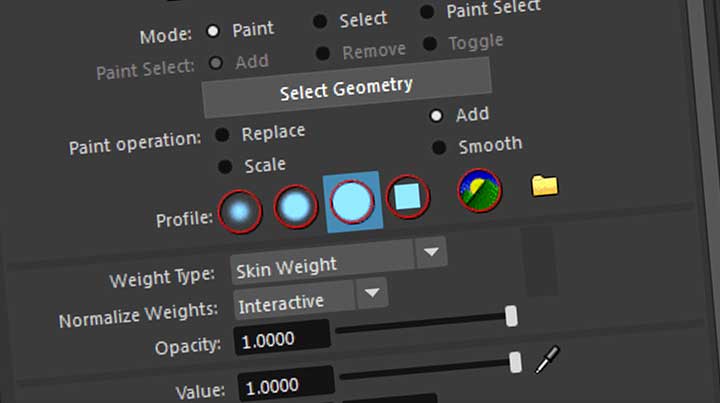
Painting weights is an important part of the rigging workflow in Maya. Love it or hate it, it’s one step that can’t be automated and requires careful attention to details. This is why it is always helpful when someone bestows weight painting wisdom, no matter what the skill level.
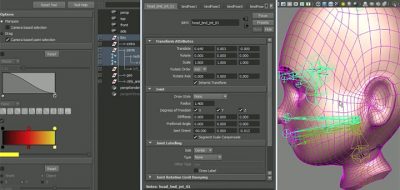
Blue-Zoo rigging artist, Vasil Shotarov transcribed 11 tips for painting skin weights in Maya, some simple, and some that you may not already know. “I am sure a lot of you are familiar with these, but even if you learn just a single new idea about them today, it might boost your workflow quite a bit” Shotarov says.
One of the most popular add-on tools for rigging artists has been ngSkinTools, Viktoras Makauskas’ skinning plugin for Maya that offers a unique weight painting workflow for artists. “I know that a lot of you are probably using ngSkinTools and literally everyone I know who works with it says they cannot imagine going back. So I am sure that some of the things I am going to mention are probably already taken care of ngSkinTools, but if you, like me, have not had the chance to adopt it yet, you might find these helpful.” Vasil mentions about his tips and the ngSkinTools plugin.
Vasil’s tips include:
- Simplifying geometries with thickness and copying the weights
- Using simple proxy geometry to achieve very smooth weights interpolation quickly
- Duplicate the geometry to get maya default bind on different parts
- Copy and paste vertex weights
- Use Post as normalization method when smoothing
- Move skinned joints tool
- Reveal selected joint in the influence list
- Some handy hotkeys
- Average weights
- Copy and paste multiple vertex weights with search and replace
- Print weights
Read the article showing Some tips for painting skin weights in Maya here.