Flipped Normals Show How to Create the Best ZBrush Alpha With a Little Bit of Extra Work.
Adding details to you creature work requires plenty of reference and source material. Forever looking for the ultimate wrinkle, scales, or skin texture to use as a Zbrush Alpha turns us all into expert googlers, but the team at Flipped Normals can show you how to create your own from what may be less-than-desirable source material.
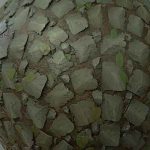
Most will take an image texture and create a Zbrush alpha out of that. The problem is that the lighting will negatively affect the success of the new brush. It will be challenging to find textures that have the lighting information removed, although it is possible. Instead, why not have a look at FLipped Normals latest tutorial that shows how you can start with ordinary textures, but then modify them into something more sharp, usable and generally more spectacular.
The technique starts in Photoshop here the High Pass Filter does short work out of separating the frequencies in the image. Using these separations on various layers, you can add them back into each other with a blend mode. Presto, lighting removed. Next is to sculpt up the details in Zbrush so that everything is nice and sharp where it needs to be. The method is something that the Flipped Normals team uses in their daily routines. “These techniques have been born from doing a lot of characters in films, and they have been production tested.”
Next time you need to create your own Alphas, remember this method!
