3D Artist Ann Uzhovska Shows How to Create Dynamic Normals setup in Maya That Reacts to a Character Rig.
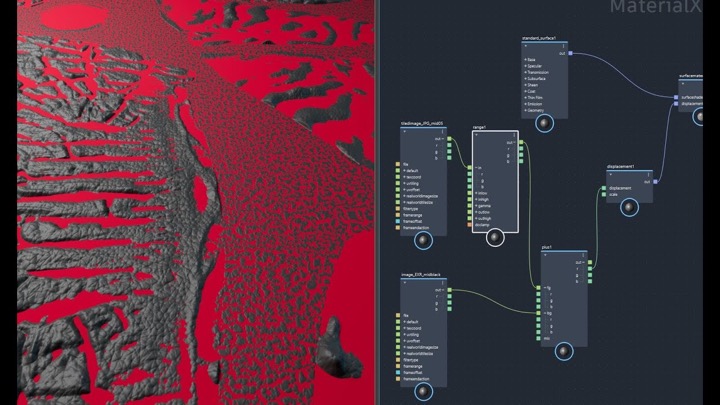
Character rigging involves a wide range of processes. Rigging limbs and faces to appear more realistic when animated is never an easy task. Adding more realistic features to a rig doesn’t necessarily require a high polygon model. You can achieve things like wrinkles by using a reactive displacement setup. You can have it, so moving parts of the rig will automatically add more creases by linking the intensity of a map. If you are working with resource-limited or low polygon characters, this is still possible, but with a dynamic normals set up.
How is this done? 3D Artist Ann Uzhovska walks through one that she set up for her Nyra rig. Watch this short but information-packed tutorial that walks through how Ann created the dynamic normals system.
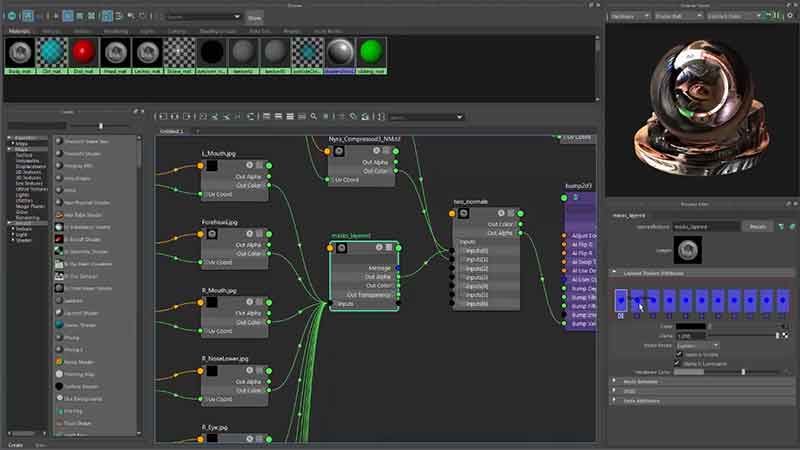
A while back, SoukiZERO, a Character TD supervisor at Motion Magic demonstrated a similar technique while covering how to create a FACS-based facial rig. The rig included wrinkles that use a custom DX11 shader driving several normal maps and displacement maps with masks.