Autodesk’s Daryl Obert offers a look at using both render layers and render passes in Maya to put together a composite, in… well, Maya composite. This is a great overview for rendering out pass images from Maya that use both render layers and passes together.
In this tutorial I go over Maya’s Render Layers and Render Passes. I also show how to put them all back together in Maya compositeDaryl Obert – Autodesk.com
Render Passes Versus Render Layers
People still find the two systems as render layers and render passes confusing in Maya, often thinking that one is meant to do away with the other. Although one is in fact newer than the other, they will both render layers and render passes will allow you to output your scene into component images. As Daryl mentions, they get to that the end result each in a different way.
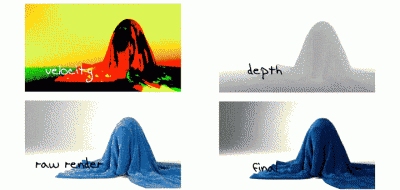
Maya render layers are really intended to segment your scene at the object level. Maya’s render passes will allow you to segment the scene at the shader level. By getting passes at the shader level you are able to siphon off various images that come straight out of the renderer anyway.
It is said that using render passes are essentially “free” in the sense that it is calculated to render out the final image anyways, and you are merely saving out files of what would be thrown away. By comparison, the render layers in Maya are at the cost of speed. Using render layers will increase your render times as it is an additional render.
The idea is that both render layers and render passes can come together to get you the contributions that you need for compositing. Daryl uses the right tool for the right job, utilizing render layers as needed. Render layers offer a quick way to isolate the background to a different image and “catch the shadows”.


