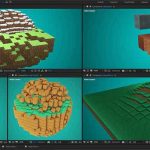
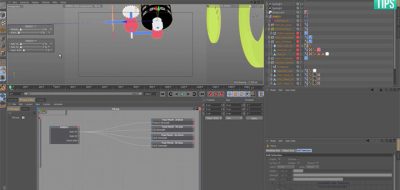
Niels ten Hulsen Shows That the Pose Morph Tag is More Than a Character Tool in C4D.
Morph targets are typically thought of for character work. C4D’s Pose Morph indeed comes in handy for creating facial expressions and designing deformations for arms, legs, and other character rig attributes. But anything can be “Pose Morphed.” Video4’s Niels ten Hulsen shows how to use the handy animation/deformation tool to create and animate some impressive forms inspired from architecture.
The tutorial covers everything from scratch to finish, including a transcript of the process below:
First, we start with a cube. We change de size from 200 to 10 centimeters. After the resizing, we make the cube editable. You can do this by clicking on the “make editable” icon or by pressing c on your keyboard. Now we want to move the pivot point of the cube and snap it to one of the cube’s corners. Hit P on your keyboard, and a menu appears. With “Vertex snap” highlighted click on “Enable snap.” Now we can move our pivot point to the lower left corner, and it automatically snaps to its vertex point. Hit P and “enable snap” again to turn off snapping mode.
We need to position our cube on a specific point on our grid. This because we want to clone our object later on and we need to maintain a certain size and position. So let’s move our geometry to minus 100 on X and minus 100 on the Z axis. Also, make sure our cube is set to 0 on the y-axis to make it stand on the ground.
Now we’ll make some extrusions. Select all three polygons that face the inside of our grid. Right mouse click to select extrude or D on your keyboard. Make sure Preserve Groups is switched off and set the offset to 90 centimeters and hit Apply.
The dimensions of our cube are 100 centimeters on the X Y Z axis. As I said, this is important later in this process.
The next step is to morph this guy into a different shape. We do that by applying the Pose Morph tag. So, right mouse click the cube and navigate to “Character Tags” and then “Pose Morph,” and set it to Points. On top you see “Base Pose,” this is our primary object. Pose Zero will be the shape we want to deform it into. So with Pose Zero selected, switch to polygon mode.
Select those two faces and move them along the Y axis, let’s say about 40 centimeters. Apply the same trick to the rest of those polygons, and we created a thicker version of our geometry. Select the Pose Morph tag and switch from Edit to Animate. With the slider, we can transition between the two shapes we created earlier. That looks great.
The next step is to put our cube inside of a cloner object. You can add a cloner object by navigating to MoGraph and then Cloner. Drag the cube inside our cloner, and we cloned our geometry. Set the mode to Grid Array. That is starting to look like a structure. Set the mode from end-point to Per Step and make sure the parameters are set to 100 centimeters. This because our geometry has the dimensions of 100 centimeters as well.
Let’s crank up the number of clones by changing the Count from 3 to 6 on all axis.
That looks great. Let’s create an animation.
Go to deformers and select the Morph deformer and make it a child of the cube. Now drag your Pose Morph tag in the Morph section. This created a slider controller for us to blend between the two shapes.
Now set a keyframe on frame zero by clicking on the tiny circle next to Pose zero. Drag your time slider to the last frame and change the zero to 100 percent. Click the small circle again to set the second keyframe.
The next step is to create a camera. From this point, you can create any shot you want. Use your creativity and play with different camera angles.
