If you recall, a while back, The Brave Rabbit released a fantastic Blend Shape editing tool for Autodesk Maya, SHAPES.
The plugin for Maya greatly streamlines the process for creating and editing corrective blend shapes in your rigging workflow, bringing some tools and features where Maya lacks.
SHAPES Brush brings additional sculpting tools to Maya which have been missing for a long time
Recently Ingo Clemens, creator of the SHAPES Blend Shape Editing Tool has released a new plugin called SHAPES Brush.
SHAPES Brush was initially developed for the SHAPES Editor, but also released as a separate and free product.
The freely available SHAPES Brush brings additional and welcome sculpting tools that have been long missed in Maya.
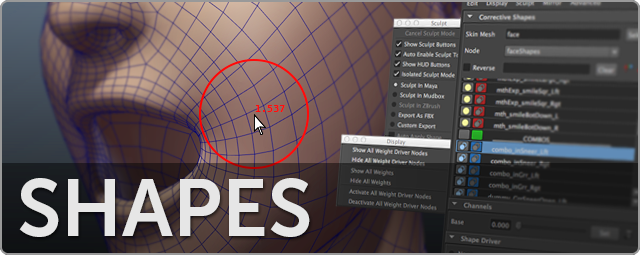
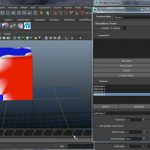
SHAPES Brush for Maya
SHAPES Brush offers a new panel in Maya and gives you better brush sculpting tools, rather than using Maya’s native Sculpt Polygons tool. SHAPES Brush features six different brushes. The initial grab and smooth brushes are standard and always available. The other brush functions can be easily obtained through holding the Ctrl key:
- Grab brush Let’s you to drag the mesh in screen space.
- Smooth Brush While holding down the Shift key the smoothing brush is activated. Smoothing is by default taking place as a relax function, which tries to keep the general volume of the mesh without shrinking effects. If relax is turned off the smoothing will also shrink the mesh. The strength of the smoothing can be adjusted.
The Ctrl-Key functions in SHAPES Brush are based on the different brush modes:
- Slide Brush Holding down the Ctrl key while dragging the brush allows you to move the mesh while keeping the underlying shape. Note that the sliding is projection based, so if the brush size is set too large, geometry facing away from the camera (or in enclosed spaces) can be badly projected. This can result in stray vertices and is usually not desired. The general goal would be to set the brush size for sliding not too large and work in iterations.
- Pull/Push Brush Lets you pull the mesh out or in along the normals while dragging the mouse. The pull/push function is based on the mouse direction.
- Blend Brush Allows you to blend to a secondary mesh. First select the mesh you want to sculpt on, then shift select a second mesh you want to blend to. Choose the blend brush and while holding down the Ctrl key you blend your mesh to the secondary selection.
- Erase Brush Lets you brush your mesh back to it’s original state it was in when you began to start sculpting. The mesh is remembered as long as you don’t pick a different mesh and sculpt on that one. Right-click the Erase button in the UI for additional options.
- For adjusting the brush size click the middle mouse button over the mesh and adjust the size by dragging the mouse left or right.
- Holding down the Shift key while middle mouse dragging sets the smoothing strength.
All brushes can work in a specified depth which is set from the brush window. This allows for working inside a mesh without having to hide parts of the geometry.
Availability
SHAPES Brush is freely available and supports Maya Versions (OSX, Windows x64 and Linux x64): 2012, 2013, 2013.5, 2014, 2015. Get the SHAPES Brush for Maya here.