Brent LeBlanc Shows How to Turn Photographs Into High-Resolution Color, Specular, Roughness and Arnold Displacement Maps.
As a 3D artist you should be walking around with a camera, snapping photographs for, at the least, reference, and at the most, material that you can use as textures. Taking the photo is only a small part of the process.
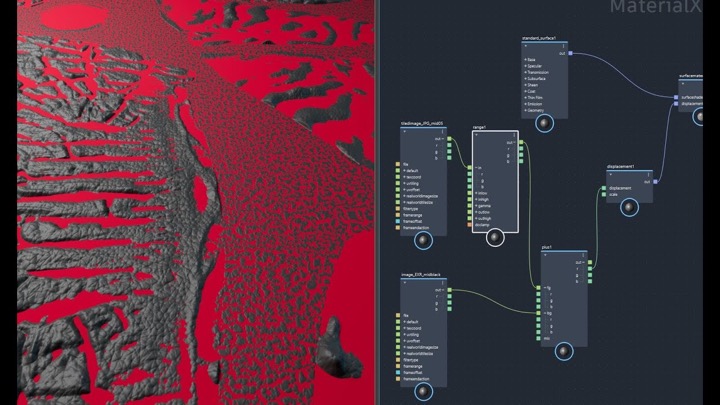
The other part is developing the picture into good maps for shaders. But how? Sharing his workflow for creating Arnold displacement and textures is Brent LeBlanc who shows hot to turn your photographs into high-resolution Color, Specular, Roughness and Displacement maps.
The tutorial also covers Brent’s method for stitching photos together in photoshop and staking displacement maps together in Arnold 5.
Check out Brent’s other tutorials that show how to add variation in materials using Object ID efficiently, and how to take that variation to the next level with scattering leaves using Maya’s MASH.